Ag 101 Week 26

Six Steps to Planning a Dinner Party - Cont'd


Setting the Table

Miss Kitty and The Kitchen Table 

Miss Kitty and The Kitchen Table 

That’s a picture of our kitchen table. It’s put together from three different sets and painted so it would all match. Nothing fancy but gets the job done.

Sometimes we do everything but eat at it.

We hold family meetings, do art projects and science experiments, re-pot plants, pit cherries, write blog posts, decorate cookies, and even cry there. I’ve taught both our kids’ reading, writing, and math at it.

When we all have time to have a meal together, we pray over burnt offerings otherwise known as dinner at it.

It’s old, well used, and now and then we have to tighten the legs. It should be repainted but has not been a priority. That doesn’t affect how well it works; only its’ looks.

Generally, we use paper plates - do not judge. I know the environmental implications and take steps to balance it out in other areas to offset them. Is it a perfect system?  No. However, I know my schedule and what it takes to make our empire spin, and there are tradeoffs. I bet there are some in your home, or on your farm, as well. We all have to make management decisions based on our situation. For us sometimes it’s paper. If not paper and much to my moms’ dismay, I use all my depression glass and china from my grandparents. My philosophy is, if I have it, I’m going to use it and enjoy it until someone breaks it.

I’m using our kitchen table and our dishes, as an illustration, to talk about the next two steps in the Six Steps to Planning a Dinner Party that I started last week

If you recall, the first two are

1.    Pick a Venue – Your Farm

2.    Make a Guest List – Crops and Insects


This week we’re going to talk about steps three and four

What Types of Tables – Soil

Choosing the place setting – Management and inputs


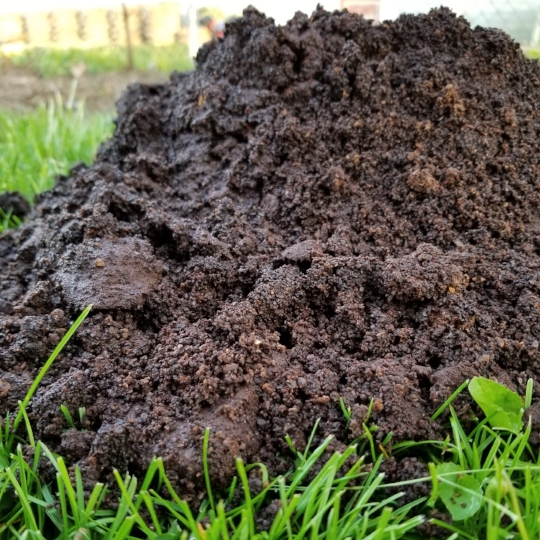
3.    Choosing the Tables – Soil

When you’re planning a dinner party, you get to pick the type of tables you want, and the seating arrangement can be based on the types of tables at your venue.

The tables can be extended, short, round, tall, or any combination of all.

Maybe the venue comes with tables, and they are already chosen for you by default, similar to buying a farm or land.

Maybe like our kitchen table, it is a miss-matched set put together for function over style.

Whether you are looking to purchase or have been farming the same ground for years, you need to invest time getting to know the type of soil you are working with or reacquainting yourself with it. My best suggestions are

-Go to the Soil Survey Website. I wrote about it back in Week 3.

https://www.theaccidentalagronomist.com/news/2018/1/13/ag-101-week-3

This is the direct link

ttps://websoilsurvey.sc.egov.usda.gov/App/HomePage.htm

Just as making the seating arrangement at your dinner party can be based on the types of tables. Your crop rotations, amendment/fertilizer choices, and types of management such as tillage options are based on the amounts of sand, silt, and clay present in the soil.

Like we work with our old rickety table, some farmers I work with have marginal land but have overcome it with a sound fertility plan taking into consideration the soil type and test results. 

Using a free resource like the Soil Survey Web can give you insights as to where to start in making those decisions.

-Get a complete soil test

I wrote about this in Week 24 – Six Things Every Soil Test Should Include

https://www.theaccidentalagronomist.com/news/2018/6/11/ag-101-week-24

I say completely because far too often it’s not that farmers aren’t getting them done, its that they don’t get all the information they need to make complete decisions. Keep in mind when choosing a lab, read what each test package includes and fill the form out accordingly. In doubt and before submitting the sample call the lab if necessary.

-Get out and walk your fields

It goes beyond planting, spraying, and harvesting. Take some time and walk your fields with your soil survey and soil test results. Take notes of the physical characteristics of the soil in each field and compare it to the map and results. In some cases, you could be surprised at what the soil will tell you as opposed to the maps and tests. I've looked at soil tests at my desk and gone out to the field to either have my thoughts proven or disproven. But without physically looking with my own eyes, it was a mere educated guess. Soil and plants will tell you things you just have to be willing to look for it. 


4.    Chose the Place Setting – Management/Inputs

Just has my choice to use paper plates or depression glass for our table setting, how you manage your farm can be based on several factors. They can range from soil type, crop choice, financial limitation, regulatory requirements, or philosophical and moral views. A few farms I work with had to create management zones due to the types of crops they grow and to make it easier for employees to understand. 

Whatever the case may be for your situation having good management plans in place and practicing them will go a long way to ensuring a successful season. I wrote a post titled - You Can’t Out Fertilize Poor Management, Week 13

https://www.theaccidentalagronomist.com/news/2018/2/15/you-cant-out-fertilize-poor-management

My husband read it and said I had been harsh. As much as I don’t like saying it, it’s true. Think of it as one of the legs of our kitchen table I spoke about earlier. Sometimes I need to tighten it to stay functional. Sometimes you need to manage the resources you have to be profitable.

Inputs need to be viewed much the same. Basing them off of the soil type, test results, and crops will ensure the right choice to produce a quality high yielding product. Managing them using principles suggested in the 4 R’s covered in weeks 6 and ten will provide financial and environmental benefits.

https://www.theaccidentalagronomist.com/news/2018/2/5/ag-101-week-6 

https://www.theaccidentalagronomist.com/news/2018/2/25/ag-101-week-10


Ag 101 Week 25

Six Steps to Planning A Dinner Party


Don’t worry; you’re not planning a dinner party.

Last week while standing in a field with a farmer, I found myself saying-

“You have to start thinking about your next growing season now. In fact, depending on your cropping system you have to be thinking about the next crop before the current one is harvested.”

As I said that, he turned around only to look at like me like I was crazy. Since I have been saying this a lot recently, I thought to myself, “How can I make all of this not so overwhelming but get my point across?” I told the farmer to think of it as if they were planning a dinner party. Silly I know, but who doesn’t love a good party with a great meal? Your crops are no different. So, over the course of the visit, we broke it down into manageable size tasks that weren’t as overwhelming.

All that being said, I’m using the analogy of planning a dinner party for the next several weeks in the Ag 101 52 Weeks of Agronomy Series.

I also realize you are in the thick of this season and for most, it has been tremendously difficult due to the fact most of the northeasts spring was wet and cold. And that is why I’m telling you this now because I want you to have a successful sustainable farm. To do that you have to be taking care of this year while planning for next.

It is like a revolving dinner party where you are the host and are setting the table for what and who comes next. Your previous amending, fertilizing, management practices, and most importantly the crops that were grown or currently growing are all factors as to what happens next. You are setting the table for what’s to follow in a field, raised bed, or hoop house.

If we are planning a dinner party, and break it down into smaller management decisions, it isn’t as daunting as you might think. A party should be enjoyable whether hosting or attending. You are ultimately doing it to get some satisfaction out of it. If you lay out manageable steps ahead of time when things come up unexpected like crop failure, weather issues, etc., there is no need to panic because you have a plan.

So, if I were to plan my next dinner party, I would use the following six steps as a guide-

1.     Pick the venue – your farm or land you’re farming

2.     Make the guest list – crops/insects

3.     What type of tables – the soil

4.     Choose a place setting – management/inputs

5.     Create the menu – soil fertility

6.     Then party like it’s 1999 or till the cows come home – harvesting, taking to market, planting the next crop

This week I’ll talk about the first two

1.     Pick the Venue- Your Farm or Land You're Farming

There’s not much to say about this step; you probably already have land you are currently farming unless moving or add additional land. If you still are looking for property and have options, I strongly suggest you look at the Soil Survey Website. It is full of information regarding soil type, hydrology, etc. that is beneficial in narrowing options. If at all possible I suggest considering what is already growing there or what the land is currently being used. This type of information will help you determine if it is suitable for what you want to do.

For the sake of our conversation, I’m going to assume you have land and that is what you have to work with.


2.     Making The Guest List – Picking Crops and Insects

Next, picking crops should be based on the lands capabilities and market demand.

If you have land that can only grow blueberries, cranberries, or currents, but you desperately want to grow celery, cucumbers, and cauliflower, you might want to adjust your plans. Or tailor the rest of your dinner party to accommodate those crops in the form of amending and fertilizing. This option can be financially prohibitive depending on your situation.

But if you don’t have a market for any of the previously listed crops, you need to invest in research as to what will sell, what could potentially sell, or how you could create a market and demand for what you can or want to grow.

You may have to find a happy medium in the center, growing what works best on your land while incorporating a few things you desperately want to grow, and producing things to accommodate the existing market. The possibilities are limitless but finding what works to keep your farm profitable may take some trial and error. I’m your go-to resource for what will grow, what could grow, or how to make what you want to grow all work, but marketing is not my forte.

 I leave market strategy up to other experts.

The following are some tremendous resources I've come across that have been valuable for growers I work with-

BootStrap Farmer Business Network

https://www.facebook.com/groups/1145901065556241/

3 Cow Marketing

https://www.3cowmarketing.com/

Mercaris

https://mercaris.com/

Current crops need to be taken into consideration because they are the ones already eating at the party. They are one of the primary determining factors of the next crop because you will have to replace what has already eaten or used. If you grew potatoes last year and want to grow potatoes again in the same place you need to replace or fertilize to have the nutrients that crop needs to produce and yield successfully. This is just an example, not a suggestion. Each crop you plant needs a specific ratio of nutrients. This is why soil testing, rotating and keeping records are crucial for a farms sustainability. Knowing a crops nutrient removal and requirements are vital pieces of information when making rotation decisions.

One of the best resources I have come across is the book-

Crop Rotations on Organic Farms edited by Charles L. Mohler & Sue Ellen Johnson

It is free at the following link

https://www.sare.org/Learning-Center/Books/Crop-Rotation-on-Organic-Farms

The reason I put insects in this category is due to the fact often we unintentionally invite guests we didn’t want. Whether this happens because we over applied manures, miss used fertilizers, or missed an opportunity with cover cropping the balance between the soil and the plant has been altered, and insects know it. Overall it weakens the plant's immune system making it more attractive to the unwanted guests such as aphids, thrips, beetles, etc. Just as our health is reliant on the efficiency and effectiveness of our immune system, so is a plant’s. If it is compromised due to malnutrition, the plant then becomes more susceptible to insect pressure ultimately leading to increased disease pressure. The following is an excellent illustration of the three factors that determine a plants vulnerability to diseases.

When it comes to insect and disease management, think of it regarding who you’re inviting to the dinner party. The use of previous management types, inputs, and crops dictate whether you are inviting troublemakers or welcome guests that will benefit and you want to have over more often. Are you fertilizing at appropriate rates, overwatering, are you clearing debris for proper ventilation, and so on?  A lot of times you will hear me refer to them as good cultural practices.

Typically, an Integrated Pest Management (IPM) programs include seven steps-

Step 1: Scouting regularly. This is the cornerstone of an effective IPM program

Step 2: Preventive Action. This includes what I previously mentioned, overuse of manures, miss use of fertilizers, or just not paying attention to the overall nutritional needs of the plant

Step 3: Identification. The proper ID of insects is critical to being able to determine the appropriate course of action

Step 4: Analysis. What needs to be done to irradiate or discourage the pest in the first place

Step 5: Treatment Selection. Choosing what is the best product to use or can it be handled with cultural practices such as weed control, hand picking, etc.

Step 6: Monitoring. Keep scouting

Step 7: Documentation. Take pictures and make field notes

You’ve picked your venue and made the guest list; this means you are a quarter of the way to having a successful dinner party. Next week we’ll talk about the fun stuff- what type of tables and place setting you want.

Ag 101 Week 24

Six Things Every Soil Test Should Include


Last week I wrote about four things your agronomist should know about you. One critical piece of information when working with an agronomist is having a soil test. It is the starting point for them to be able to build a fertility plan that makes financial and environmental sense for you and your farming system.

One challenge I face when working with farmers is not that they haven’t gotten a soil test done. However, the results are missing critical pieces of information that are needed to make the best recommendations tailored to their specific situation. Soil test results are a snapshot of what was happening than when it was collected. However, without the entire picture making the best fertility choices can cost you financially and have unforeseen environmental impacts both on and off your farm. Investing a few minutes and dollars can ensure you get all the necessary information that will save you in the long run.


1.     pH

pH is the potential amount or concentration of hydrogen ions in the soil. It is represented by a negative logarithmic scale, zero through 14. Acidic soils, represented by a pH of below 7.0, have a higher concentration of hydrogen ions available. Alkaline soils, represented by a pH above 7.0, have a lower concentration of hydrogen ions available. It is how many hydrogen ions are in that particular soil. – Talk to the Blueberries

https://www.theaccidentalagronomist.com/news/2017/4/1/talk-to-the-blueberries-they-will-explain-it-to-you

pH is the foundation of all soil chemistry. In which it plays a role in microbial activity that drives nutrient reactions in the soil directly affecting plant health and yields.

2.     Organic Matter (OM)

Often, I refer OM to being the pantry that microbes have access to, where nutrients are stored that plants need. Due to the fact this fraction of the soil acts as a holding area, or pantry, for several nutrients, it is essential to know what percentage makes up the soil in a given sample. 

OM plays a role in storing a vital nutrient, such as nitrogen. The estimated amount of nitrogen (lbs./ac) that can be released or ENR that can potentially be available over the growing season is relative to the percentage of OM present in a soil. The decomposition of organic matter can release about 20 lb. N/acre/year for each percent of organic matter. Knowing these amounts can help to adjust nitrogen inputs throughout the growing season leading to better cover crop choices, more productive crop rotations, and increase the efficiency of a fertility program.

Depending on the lab, this may not be included in a standard package and can often be overlooked. Pay close attention to the soil sample submittal form, making sure it is tested for each sample.

3.     Cation Exchange Capacity

If OM is the pantry where the nutrients can be stored, cation exchange capacity or CEC is the number of shelves or sites you have to store nutrients such as calcium, magnesium, potassium, and other positively charged ions.

Say, for example, I have two pantries’ in our home, one with eight shelves and a smaller pantry with two shelves. That gives me a total of ten shelves to place food on for storage. Clay, which is predominantly negatively charged, could potentially be the pantry with eight shelves and be able to store nutrients that have a positive charge. OM could be the pantry with two shelves, being made up of both negatively and positively charged ions, can store either. In the case of nutrient storage in soil, how much and where it is relative to the amount of clay and OM, and the sum is referred to as the Total Cation Exchange Capacity (TCEC).

4.     Base Saturation

Base Saturation is a percentage of a nutrient, or cation makes up the TCEC. How much shelf space in the pantry that particular cation is occupying in relationship to the total size of the pantry.  When it comes to balancing soil nutrients, there is a school of thought that uses percent base saturation results. Whether that is the measure you are using to adjust nutrients or not, it is still a good overview as to the ratios nutrients are present in the soil. And can be used to help determine the most useful input to achieve the desired balance of nutrients based on other factors as well.

Nutrients that should be included are

Potassium (K), Calcium (Ca), Magnesium (Mg), Hydrogen (H), and Sodium (Na)

5.     MacrONutrients

For this post, which is to make sure farmers get the appropriate test results for an agronomist to make sound and relevant recommendations, I am listing nutrients that a standard soil test should include, and as they are categorized by most labs across the country. For example, I could go into more detail talking at length regarding Nitrate testing and the categorization of sulfur being a micronutrient as opposed to a macro. But that’s not the point of this post.  What a farmer needs to have reported in the results are the following essential nutrients that make up the majority of a plants diet including-

Calcium, Magnesium, Potassium, and Phosphorus

6.     MicrONutrients

Sometimes referred to as trace elements, due to the fact they are required in smaller amounts than the previously listed macronutrients.

These should include sulfur, zinc, boron, copper, manganese, and iron. Depending on the lab, sodium could be reported under this category as well. I’ve listed them in importance for how and why I make fertility recommendations. Farmers need to note that some labs charge per element or as a group. You have to be diligent when filling out the soil sample submittal form, including ones that are pertinent to your situation.

Don’t let a few extra minutes or a couple of extra dollars keep you from getting-

The Six Things Every Soil Test Should Include

Ag 101 Week 23

Four Things Your Agronomist Should Know About You

I’ve been doing a lot of farm visits lately. I wish I could get to everyone I work with and meet them one on one and walk all their fields. The reality is, there is only one of me. So, until I can convince the boss to let me hire another one of me, I will continue to take on new clients in other states and do my best to build a relationship with them with the aid of Skype, Zoom, email, texting, pictures, etc. I’m grateful technology has made working remotely with farmers possible, but nothing can replace seeing it with my own eyes.

As I was driving home from a farm visit last night, I got to thinking…

What can I, or any agronomist do to make a relationship work with a farmer whether I can be on the farm regularly or not?

It dawned on me-

I need all the information I can get about every aspect of their farm, their fields, and their crops.

The farm I was driving home from is in Maryland. I spent a couple of hours walking their fields, talking with them, and answering questions. As we were wrapping the tour up during a short walk to my car I learned more about what they had done in the past seven years to two of their fields, then I had when we were out in them.

I work with a farmer in New York. I can tell what field they are talking about without even knowing the assigned field name or looking at the map. I know their fields by the way they describe what is going on, what the challenges are, what the crops are, and so on. I know what equipment they have and what fertilizer recommendations I can make based on it. I know all of this because I have spent five years asking questions, keeping notes, and listening to every detail.

When I work with a farmer, I am in a constant state of getting to know them and their farm or as I like to call it -dating.

Not actually ‘dating,’ like we’re a couple. But dating in the sense that I have to be genuinely interested in their farm. I also have to take an interest in them as a person to get all the information I need to help them be or stay the farmer they want to be.

So, I broke the information down into four things your agronomist should know about you to successfully build a relationship that will help elevate you as a farmer. But just like any other relationship, it takes time and a desire to want the relationship to work. To be honest, this probably won’t be a complete list either, each farm and farmer are unique, and what I need to know about one, I might not need to know about another. These are good starting points to work from.

I want to know…

1. The Past-  Field History

Previous crops

Previous amendments/fertilizers

Previous insecticides/herbicides/fungicides

Previous soil/tissue or other analytical testing results

Previous crop failures/yield results


2. Your Present – Current Field/Farm Conditions

Current field/crop conditions

Current amendments/fertilizers applied to that field

Current challenges/concerns

Current yield goals/expectations for that crop

Available equipment/labor/resources


3..Your Future – Next Intended Crop

Crop rotation plan

Crop yield goals

Any future testing, i.e., soil sampling


4. Your Farming Style – Management Practices

This list is endless

Farming style may sound funny but, hear me out. I work with every type of farmer imaginable. Each one has their vision, i.e. goals or expectations, for their farm and how they want to achieve them. Each one has its own set of limitations or resources available.  I have to know and understand all of that to give advice and make recommendations that apply to that farm and farmer, not the other guy down the road doing things differently. This includes information as to

Do you farm certified organic, certified naturally grown, bio-dynamically, etc.?

Any grazing or tillage methods, etc.

The time commitment you’re willing, can, or want to make to farming

I’ve said before; agronomy is science applied practically. All the science and product knowledge mean nothing if a farmer can’t use it. The only way I can do that is to get to know how and why you are farming. Like as if we are dating, and I am always asking questions to get to know you.

20180603_145820.jpg

Ag 101 Week 22

I Got Nothing...

I'm not going to lie, coming up with a topic for this week has been challenging. I usually get inspiration from things I've been doing or things I've been questioned about in the previous week. But these past couple weeks have been doozies. 

I have dealt with everything from gray mold on strawberries, hail damage on lettuce, making fertilizer recommendations, nailing down seeding rates, explaining my opinion on sap and Brix testing, etc. I've been to pasture walks and spoke for the Williamsport Herb Guild. I've touched base with clients and needless to say I came up with lots of topics and still no real inspiration as to exactly what to write about.  

To cap off the week, I spent 4 hours updating the terms, conditions, and privacy policy for the website to be in compliance with the GDPR.  Don't ask me what that stands for, I'm not good with acronyms or military time. All I know is feel free to stop reading at any point, feel free to unsubscribe at any point, feel free to not deal with me at any point. I will not be offended, TRUST ME! If you do stay, you will hear some ranting and you will wear down your red pen fixing typos. But hopefully, you will also get at least one piece of something that will help you to be the best farmer, grower, or producer you want to be.

So, when it came to writing a post, I was just not feeling it...

Then while I was taking pictures of my peonies after I had told my husband I was writing, I thought "Give them something useful. Something practical. Something to help them through the season." Then they can unsubscribe to go look for a highly trained world-renowned agronomist. Just kidding. 

Well-fed plants are usually less susceptible to soil-borne organisms than are poorly nourished plants. Good fertility may so enhance the resistance of the (host)plant that the parasite can not successfully attack the roots.
— U.S Dept. of Agriculture 1957 Yearbook

It can be said that having a well-nurished plant will deter insect and other disease issues as well.

Earlier this week I shared a liquid fertilizer program for strawberries. You can go to this link and sign up for the newsletter to get a printable copy. 

https://www.theaccidentalagronomist.com/news/

This year growers I work with have had success in high tunnels, while those growing outside have been challenged. The weather is a dominant factor for the challenges. Sometimes all we can do is mitigate the best we can, looking ahead to the next crop.

So that leads me to give you some suggestions of things you can have on hand to help grow through any up and coming challenges that might be on the horizon. I've also tried to make them things that could be readily available at any home and garden or farm store. 

Kelp Meal/Kelp Liquid

Anyone that has been around me for five minutes knows I like kelp. It is effective and multi-purposeful. 

Kelp is not curative, however, it can be used to help boost a plant's immune system helping it to get through periods of stress. It has growth simulant hormones called cytokinins, gibberellins, and auxins that encourage cell health, strength, and growth. 

It has insect repellant properties due to the fact it has iodine which has been shown to deter sucking and piercing insects. I do caution that it is only effective if we use it judiciously. I have growers that use it in the insecticide box when planting corn. The first year the rate would be 6-8#/ac. If planting corn after corn, which is never recommended, however, sometimes practiced, the rate would need to increase to 10-15#/ac. 

Just as other chemistries, its overuse can diminish its efficacy. 

That being said, I add 1-2oz of liquid kelp per gallon to any irrigation water I'm using in my containers and vegetable garden. I generally water with it every 7-10 depending on rain amounts, which equals out to be roughly every other time I water.  

The meal can be steeped in water/vinegar to make the liquid, leaving you with the meal to use as an amendment and the liquid to water with.

For example:

1/2 cup water

1/2 cup vinegar

1 cup kelp meal

Let steep for several days, drain off the liquid and add 1-2oz. per gallon of water and apply every 7-10 days or as needed.

The meal can be used at the time of planting or as a side dress throughout the growing season. 

Aragonite/Oyster Shell

Aragonite can be harder to find, but well worth the effort. Oyster shell would be a good substitute. Both are an excellent source of calcium and can be used dry or steeped in vinegar.  This could be good for tomatoes when they are lacking calcium showing signs of Blossom End Root(BER). BER is really not a calcium issue but an irrigation one. However, a quick readily available calcium application can help the plant get through it and keep producing. I think I sense another idea to write about...

For example:

1 cup aragonite/oyster shell

1 cup vinegar

Let steep for several days, drain off the liquid and add 1-2oz. per gallon of water and apply every 7-10 days or as needed.

5% - 10%Vinegar

This has a multitude of uses. You can use it in liquid fertilizer blends to stabilize a mix and help balance the pH. It can be a good liquid to use an as extractant, like with kelp meal and aragonite. If used appropriately it will have a nominal effect on water pH but not to a level that would be detrimental. However, always use caution and test pH of any irrigation system and soil regularly.

Liquid Fish

There are several formulations on the market. I look for one that has sulfate of potash (SOP) and kelp in it.  If you can find one with sodium nitrate, then that is an added bonus. It is a great stand-alone fertilizer however, I have growers using it in the following mix and see great results.

Liquid Fish Blend:

1-2 gallon liquid fish

1-2 quart liquid kelp

1 pint 5-10% Vinegar

5 pounds sugar or 1-3 oz. molasses per gallon(optional, but recommended)

Add 1-2oz. per gallon of water and apply 1-2 times during the growing season dependant on the crop and soil tests. 

Another blend that is easy to mix yet effective is 

Fish/Kelp Blend:

1/2 Fish Fertilizer

1/2 Liquid Kelp

Add 1-2 oz. per gallon of water and apply every 7-10 days, or as needed. 

This is great for transplanting or times of stress, fertilizing and stimulating growth at the same time. 

As always soil and tissue testing are recommended before implementing any type of program. These are merely suggestions and not an exhausted list of things you could potentially have on hand. If you are experiencing challenges, a call to your local extension office or an agronomist might be necessary before making any fertilizer/amendment applications as well.

*Please take cation as to the time of day you apply liquids when using as a fertilizer, early morning is optimal, or in the evening. 

Once I have recovered from the whole GDPR thing, I'll put together a PDF with the information in this post. At that time you will be asked to subscribe to my newsletter to get it. Then, once you have done that and gotten your free printable fertilizer recipe PDF you can unsubscribe, no hard feelings. 

As always, if you have questions, don't hesitate to ask. Better yet send pictures and we can talk through some issues you might be having. 

20180528_124734 (1).jpg

Strawberries

Several growers I work with are having a challenging year when it comes to keeping their strawberries healthy. Here is a simple mix you can use throughout the season to help keep them producing. 

Strawberry Recipe

1. Spray the plants once per week with liquid Kelp, using one pint per backpack sprayer of approximately 4.5 gallons of water
2. When plants are about 2 ½ inches tall and starting to bloom, spray them with liquid kelp again, twice per week, each time until they were dripping wet
3. Spray them with liquid fish and kelp, 1 pt. each per sprayer twice a week-right through the whole season

*When mixing spray add 1-2tsp of a mild detergent. I use Basic H from Shaklee because that is what the original recipe called for
**Use a liquid fish similar to Neptune’s Harvest Fish Seaweed Fertilizer 2-3-1 or any liquid that is a blend of fish and kelp                                                                                                                         ***As always, soil and tissue testing are the first steps to a healthier crop                                        ****Do not spray during the hottest part of the day, mornings are best


tmp_2018052407295175418.jpg

Ag 101 Week 21

What’s Your Threshold?

This spring has been extremely challenging for growers in the northeast and other parts of the country.

I find myself saying the same thing throughout the spring season, “The weather has not been on our side.” Growers are facing extreme weather events that are leading to increased crop damage, insect, and disease pressure resulting in decreased yields or total crop loss.

I also hear myself saying,

“Summer doesn’t matter if you don’t have a good spring.”

I realize that statement is dependent on the crop your growing and how you manage your farm. I’m usually referring to management decisions made before their growing season gets started, then during the summer months they have to live with them. But lately, spring weather conditions have lead to more challenges effecting the rest of the growing season.

This year I have growers that will no longer be growing crops like strawberries due to weather conditions being so unfavorable they can’t afford the risk. For economic reasons they need to focus on crops they can manage in the weather conditions we are now experiencing. Management has now taken on a whole new level of importance.

At the opening day for a local market this week, vendor numbers where low due to spring weather impeding their ability to bring sellable products. One farmer and I were discussing the amount of hail damage on his lettuce and if he could even sell it for an amount that would at least cover his travel expenses for that day.

As I’m writing, it’s raining for the 6th day this week, I know the sun will eventually come out, and things will start to perk up and grow again. Before we know it, we will be in the dog days of summer, and everyone will be hoping for some rain, so they don’t have to run their irrigation. It is a never-ending cycle.

All of this and experiencing my own crop loss this week due to a hungry family of bunnies has me thinking about what threshold a grower can tolerate before they have to make management decisions about harvesting, spraying, or even writing a crop off as a total loss. Do most farmers even know what factors to consider or how to establish a value? And, do they have a plan in place if that threshold is reached.

The dictionary definition of threshold is

ˈTHreSHˌ(h)ōld/ noun

noun: threshold; plural noun: thresholds

2.     the magnitude or intensity that must be exceeded for a certain reaction, phenomenon, result, or condition to occur or be manifested.

"nothing happens until the signal passes the threshold"

synonyms: lower limit, minimum "the human threshold of pain" a limit below which a stimulus causes no reaction.

"everyone has a different pain threshold"

But what does threshold mean in agronomic terms?

Every farmer needs to establish their “pain” or economic threshold they can withstand to keep themselves profitable and in business for years to come.

First, let’s look at specific thresholds-

Economic injury level(EIL) - The smallest number of insects (amount of injury) that will cause yield losses equal to the insect management costs. EIL is also referred to as the break even point.

When pest density is above the EIL - damage exceeds the cost to control

When pest density is below the EIL - damage is lower than the cost to control

Economic threshold - The pest density at which management action should be taken to prevent an increasing pest population from reaching the economic injury level.

The economic threshold is also referred to as the action threshold. That is the point at which insect numbers (population) have gotten to the point you need to mitigate them through cultural practices or inputs such as spraying in order not to reach the economic injury level.

You as a grower have to determine what is the pest density that will justify the cost of applying control measures.

Deciding levels and thresholds at which you have to reach before action is taken can include using formulas and having an understanding of the pest and crop it is affecting.

I work with a specialty grower that produces a niche crop. He sells to high-end wholesale buyers only. He knows the value of his crop and grows a certain number of plants to accommodate a 25% loss. All his management decisions are based on that, and it works for him.

I grow in my backyard. I grow whatever I feel like that year. I give most of it away and eat what is leftover. I know the value and can assume a 100% loss. It works for me.

It’s a good thing it's easy for me to write my season off as a complete wash. The rabbits have decimated everything I planted, and they keep coming back night after night to clean up what they left behind. I realize I’m not growing for profit this year so let them eat, and I’ll figure something else out when I have more time. 

Both of us have established the level of pain or our threshold we can tolerate and how to plan for it. He grows more plants to accommodate; I live with it.

But what if you are growing for market and need to establish that number.

Here are several factors to take into consideration-

1. How much aesthetic or economic damage can be tolerated?

2. What is the value and production costs of the crop at various levels of damage?

3. What is the history of the field?

4. Do you understand the difference between injury and damage and what level is tolerable?

Injury - the effect of pest activities

Damage – monetary value lost due to the pest activities causing injury

5. How much do the control measures cost?

6. Is the insect or disease distributed in the field so effective control can be reached without further crop disturbance?

7. Do you have the ability to control the pest quickly and effectively?

8. Do you have a market or use for a less than perfect product?

9. Do you have the ability grow enough to make up for a certain percentage of loss?

Lastly, here is a simple equation that can be used in conjunction with the factors above to help establish a comfortable threshold for your farming situation

EIL (Economic Injury level) = C*N / V*I

C = cost of controlling the pest per acre

N = number of pests injuring the commodity per acre

V = value of the commodity per acre

I = percentage of commodity injured (% loss expressed as a decimal)

EIL is expressed as the number of pests per acre or pest density that justifies the cost of applying control methods i.e. spraying

Why is all of this important?

Bottom line you need to stay profitable to stay in business. Having established thresholds will help make management decisions to do so, even if it is as simple as growing more to accommodate a percentage of loss or knowing at what pest density you can justify the cost of applying control measures.

Extremely unprofitable broccoli, thanks to the family of rabbits living in our hedge

Extremely unprofitable broccoli, thanks to the family of rabbits living in our hedge

Ag 101 Week 20

I Only Eat Cheesecake

IMG_20180512_182140_008.jpg

 Let me explain.

I have an available supply. The market down the road has the best in town, and sometimes the market has it on sale. I can stock up when that is the case. I can freeze it so I will never run out. I always have it on hand. I have been able to maintain a somewhat healthy weight while on my cheesecake only diet. Well, sort of. A healthy weight is a relative term. As long as I exercise and still fit in my sweatpants, that’s fine with me. I like my sweatpants. So far, my health is reasonably good while on my cheesecake only diet. I realize that eventually there is the potential for me to have some nutrient or vitamin deficiencies, but so far so good. If it’s not broke, don’t fix it, right? I’ll know when I’m dead there is a problem.

Sounds a bit dramatic and crazy, right?

That’s what I think when a grower tells me they only use compost. Be upset with me, tell me that it’s working just fine for you, justify it all you want but that is how you are feeding your soil and your plants. You are feeding them a nutritionally imbalanced diet that even though you are intensely rotating crops things will eventually catch up with you. In reality, you are not feeding them; you are amending the soil. You are changing the physical characteristics of the soil while ignoring the nutritional needs of the crop because compost is an amendment, not a fertilizer. 

Let me ask you a question. Would you eat like that?

There seems to be a more significant number of farms starting in the business. A farm up the road has been composting for several years, another in the opposite direction is now offering its own brand of compost, and local municipalities in the area have started some windrows of their own. Compost business has started as a means to handle wastes from other industries. It is available year-round and at what seems to be a reasonable price, sometimes being free for the taking. 

Let’s look at an average analysis of your garden variety compost. Guess what; there is no average. First, compost companies source material from a variety of places. Companies in our area use mushroom waste, or food waste, some paper-based products, some use manures, some use peat or sphagnum moss, or combinations of all of the previously listed. These inconsistencies in materials and how long it is composted lead to the variabilities in nutrient analysis. Second, the nutrient analysis is negligible due to the fact nutrients are diminished as the materials are decomposed. It is an inevitable part of the process, leaving you with an amendment intended for adding organic matter and microbes. 

I am not bashing the industry.  A vendor questioned me after a presentation about this very subject, and they have yet to get the information I asked for. I wanted analysis and data showing me what’s in their compost. That’s it, that is all I asked for. What I got were marketing talking points that I later saw on their website. That’s all you see from any of them. I’m not singling out any one company or manufacturer. They are all doing the same thing. Go to the US Composting Councils’ Website. You get a lot of marketing points, but I had to spend an hour digging for some hard-core research, and it turned up useless for any grower I’m working with.

https://compostingcouncil.org/

Do your due diligence and look into the source of the compost you are considering. Better yet source it from a reputable manufacturer or farmer that is willing to disclose what is in it and what the analysis is, making sure a reputable lab did it.

Composting your food and lawn waste is a great idea, however, to be done successfully it can be labor-intensive and time-consuming. The volume at which you need to compost can be prohibitive as well.  If applying 1 inch of compost on a 30X30 garden that is almost equivalent to 2.8 cubic yards. You would need anywhere from two to three times that volume in initial waste materials to produce that.  I’ve worked with several farmers that have tried to compost and farm and cannot find enough time to do either the justice it deserves.

You may be wondering how well the cheesecake diet works-

I have personally tried the cheesecake only diet, and I’m here to tell you it did not turn out well for me. I gained 75 pounds, and I ended up back in my fat pants. I am tired and cranky most of the time unless I am medicating with coffee or another form of therapeutic beverage. I am on the verge of exploding if I do not make changes. I have radically amended my physical characteristics while ignoring any nutritional needs I have. I’m on the brink of a health crisis if I don’t change.

What do I need to do to make changes-

Over the past few weeks, I have decided to get back to eating a balanced diet that consists of healthy proteins, fats, vegetables, and fruits. I have given up one therapeutic beverage except for coffee. My fern leaf peony and coffee will be buried with me. I am exercising on a regular basis and getting my family involved. As much as I love cheesecake, I have had to eat a more balanced diet. I have to find a balance between changing my physical characteristics and my nutritional needs using exercise and food.

Guess what – Your soil and plants need a balanced diet as well.

Your soil and plants will eventually send out signals just like what happened to me. They will not end up in their fat pants, but they will be tired and cranky. Yields will start to go down, plants will start and look unhealthy while being subjected to higher insect and disease pressure. An unhealthy plant is an open door to unwanted issues. I often hear “Well I rotate, and that ensures the plants are getting what they need.” You do have a point, but if you rotate into a crop that wants a nutrient that isn’t there because you might have overlooked nutrient removal from the previous crop? Then what do you do?

Just as I have to use exercise and food to be healthy, you need to use management strategies and inputs to balance soil and plant health.

What are simple steps you can take to get off the compost only diet-

Truth, I don’t want you to kick the habit entirely. I want you to use compost for what it is best suited, and that is an excellent source of organic matter and microbes. I want you to use it when it is needed to enhance your fertility program, not be the main component of it.

-Get a soil test that includes organic matter.

A comprehensive test that includes significant nutrients N-P-K, along with trace minerals and organic matter will be the best investment to understanding what your soil needs.

-Look your farm on the soil survey website to identify your soil type.

Understanding your soil type will help you learn how to work with the soil you have.

-If using compost ask the manufacturer for a lab analysis done by a third party reputable lab.

If they can’t provide one, you have to decide if you want to take the risk or look for a reputable manufacturer that can provide a current one. Before purchasing it take a minute and smell it. Smelling it may sound odd, but how compost smells can be an indication as to how well it is broken down and how healthy it is. Just because you are working with the rotten stuff, it shouldn't smell rotten. If it has been composted adequately, it should smell fresh and earthy.

20180513_160853.jpg

Ag 101 Week 19

Grounds for That

I’m talking coffee grounds this week. It all started when I happen to see a post on Facebook from my local coffee shop 3J's Coffee . They were advertising they had free coffee grounds for your compost pile. I thought to myself  “It’s good they sent the right message and said need compost not fertilizer?

20180502_190807.jpg

https://www.facebook.com/3jscoffee/posts/1872362372776188

I happen to stop in later in the week and saw the owner. I mentioned that I appreciated the fact that they said for your compost pile. She said thank you and from there this week’s topic was decided.

It’s not something the large-scale grower considers. I realize this. I was even thinking about ditching the topic altogether. After last week’s half-assed attempt to instill wisdom about the use of vinegar, I was convinced I needed to step up my game and talk about more serious-minded agronomic topics like how to grow 200 bushels of corn per acre.

Then I decided, screw it. Some well-meaning other person has that covered. I’m talking about coffee grounds. And here’s why

1.      A considerable percentage of growers I work with started as hobby or backyard growers.

2.      The industry lacks for current if any research regarding anecdotal information about inputs used             by naturally-based or certified organic growers.  

As I mentioned, a considerable percentage of growers I work with started as hobby or backyard growers. They bring with them all the googled, passed down, well-meaning information gardeners’ like to share. Then they become a CSA/market grower doing it on a larger scale with that same backyard information mindset. Not that there isn’t value to that. I’m not putting anyone or anything down. But to scale up, you have to think up and ditch the backyard mindset. Don’t lose the zeal and excitement for growing great produce or vegetables but take your thinking aka management to an elevated level on par with the scale it takes to supply a CSA or market.

One of the nuggets of great info out there is the practice of using coffee grounds as fertilizer. I understand the positive environmental impact it can have to keep them out of landfills. I also realize that there is very little if any real data to support the fertility claims that are made.  I often hear things like, “I use it for my rose bushes with a banana peel, and they grow bigger and bigger every year. I have the best roses in town!” For the backyard grower that might be sufficient evidence, however, for a production level grower, it is not scientifically based research adequate to be of benefit to a CSA/market scale system.

In an abstract from Urban Forestry & Urban Greening Vol. 18 August 2016 pg. 1-8, it suggests not to use coffee grounds in a horticultural production setting due to stunted growth and inconclusive data.

https://www.sciencedirect.com/science/article/pii/S1618866716300103?via%3Dihub

However, in a study conducted in South America, there was evidence that the addition of coffee grounds in Arenosols soils was beneficial.

https://onlinelibrary.wiley.com/doi/full/10.1111/j.1475-2743.2010.00315.x

Note that each study was conducted in entirely different settings and different soil types. It’s not comparing an apple to an apple, and that needs to be taken into consideration. There is not enough research out there for me to feel comfortable recommending a grower use it in their fertility program. And what I could find on actual numbers is variable. To get accurate levels of the nutrients and pH, you would need to take a representative sample from each batch of grounds you collected. That almost defeats the purpose of it being an economical addition to a fertility program.

However, I do feel that with what information is currently available coffee grounds could be an excellent addition to composting. Research has been done that suggests coffee grounds could help maintain temperature levels that will kill pathogens. Whether that is entirely accurate or not, due to the fact the research is still somewhat lacking, it still can’t be a bad addition in appropriate amounts.

https://phys.org/news/2008-07-coffee-grounds-perk-compost-pile.html

My stash of coffee grounds headed for the compost pile

My stash of coffee grounds headed for the compost pile

My advice

If you are a gardener doing some composting, use the coffee grounds as an addition to your compost pile. If you want to amend specific areas of your garden directly, apply an appropriate amount and work it into the soil.

If you are a market/CSA grower use them in any composting, you are doing but not directly incorporated in any production areas like greenhouses or raised beds. You should now be at a level you are monitoring and adjusting the fertility of those systems with specific inputs, and due to the variability of coffee grounds, there is the potential for things to get out of balance. If you have a source that can supply them in a large enough quantity while not inundating you with them, get the grounds tested for nutrient content and pH. That way you have an idea what you are working with and can make a more sound decision as to how and where you could potentially work them into a fertility plan. 

Go to your local coffee shop buy a cup of coffee take some time to get to know the owner and staff and while you’re there get a bucket of coffee grounds for your compost pile.

Just as they have the potential to be good for your compost, it might be an excellent way to build a relationship that could potentially turn into a customer for you, and there is always grounds for that.

Again, thank you 3 J’s Coffee Shop in Palmyra, Pennsylvania. You made this agronomist’s day by sending the right message and making a great cup of coffee.

Ag 101 Week 18

Not Your Grandma's Vinegar

This time of year, I get questions ranging from how to keep things alive to how to kill them. One thing I’ve talked a lot about recently is what can farmers and gardeners use for weed control that is relatively inexpensive yet effective.

My first response always includes the obvious cultural practices including, but not limited to-

Maintaining clean fence rows and perimeters

Mow/graze in a timely manner

Cultivate on a regular schedule

Use aggressive cover crops or inter-seeding – by aggressive I mean one that grows fast

When that isn’t enough, and you need to use another alternative my first suggestion is 20% or 200grain vinegar. Just as the title said, this not your grandma’s 5-10% vinegar she uses for pickling or cleaning, but the gnarly eat through your pants kind.

For home and backyard growers

The homemade concoctions you read about, in my experience, are not sufficient even for the home/backyard grower. In my opinion, you need to ditch the dawn/salt/vinegar mix and use the more effective strength vinegar I’m going to talk about. It will save you time and effort, ultimately saving you money as well. Remember size vs. scale? If not refer back to Week 4

https://www.theaccidentalagronomist.com/news/2018/1/21/ag-101-week-4

So, what kind of vinegar am I talking about – 20% or 200grain vinegar, commonly referred to as Ag or Food Grade. It can be purchased online or at some farm and garden type retailers.

Some points to think about when using 20% vinegar

1.     It is not a systemic herbicide, meaning it will not enter into the plant's metabolism and kill it that way. It is a burn down that may have to be applied more than once. Target younger weeds at the appropriate stage of growth for maximum efficacy.

2.     It is non-selective, it burns whatever it comes in contact with even the person applying it. Be careful and strategic when using it and don’t do it on a windy day.

3.     Make sure you cover as much surface area of the plant as possible, contact is critical.

4.     Growers I work with have found the following rates to be effective

                 For tank mixing 8-10 gallons/acre with as little water as possible

                 For backpack and hand sprayers 50/50 vinegar & water

5.     The general rule of thumb

If spraying to kill spray during the hottest part of the day when the sun is the most intense.

There are several other products on the market for the chemical free, natural, or certified organic grower. They are usually oiled based and have been found useful as well. One of the most common that I have worked with is Nature’s Avenger. For several years I recommended that you dilute it with vinegar. After talking with a field rep from Nature’s Avenger, they have found there is no increased efficacy of either the vinegar or their product using it that way.

My suggestion to a grower is to start with a single chemistry first while maintaining good cultural practices. If weed pressure escalates and cannot be efficiently controlled with one chemistry instead of mixing products, alternate spraying with a different one.

Have questions – don’t hesitate to ask